

Things to Know Before You Buy
- White vinegar's mild acid dissolves calcium and lime scale without scratching chrome, brushed nickel, or matte black finishes.
- Undiluted vinegar works faster than a diluted mix, but soaks of more than an hour or two can dull rubber nozzles, so don't leave it on overnight.
- You don't have to remove the shower head to clean it. A vinegar-filled bag secured around the nozzle plate works on fixed and handheld models alike.
- Heavy limescale buildup usually needs a longer soak plus a light scrub with an old toothbrush instead of a rinse alone.
- Cleaning your shower head with vinegar every four to six weeks in a hard-water area keeps deposits from building back up between soaks.
How to clean shower heads with vinegar comes down to one simple reaction: white vinegar's acidity dissolves the calcium and lime deposits that clog your nozzles and choke off water pressure. If your shower has turned into a weak, uneven trickle, or you're seeing white, crusty buildup ringing the holes, hard water minerals are almost certainly the cause. You don't need a plumber, a new fixture, or harsh chemicals to fix it. A bottle of vinegar you likely already have in the kitchen, plus about an hour of mostly hands-off time, gets the job done.
This guide walks through the process we put together after comparing manufacturer maintenance instructions with dozens of verified owner reviews describing what actually clears stubborn, hard-water buildup. You'll find two approaches below: soaking the shower head in a bag of vinegar without removing it, and a bowl soak for handheld heads you can detach. Either way, the five steps are the same, and none of them require special tools beyond what's already under your sink.
What You'll Need
- Supplies: white distilled vinegar, baking soda (optional, for heavy buildup), rubber bands or a zip tie
- Tools: a resealable plastic bag or small bowl, an old toothbrush
Step 1: Inspect the shower head and choose your soak method
Before you touch the vinegar, take a close look at the nozzles. If you see white or greenish crust ringing the holes, or the spray pattern is uneven with some jets weaker than others, mineral deposits are clogging the openings. That's the same buildup you'd expect from hard water, and it's exactly what vinegar is built to dissolve.
Next, decide how you'll apply the vinegar. Fixed, wall-mounted shower heads are usually easier to clean in place with the bag method: fill a plastic bag with vinegar and secure it around the head so the nozzles stay submerged. Handheld shower heads can go straight into a bowl of vinegar, nozzle-side down, which gives more even contact with fewer leaks. If your fixture unscrews easily, removing it first makes scrubbing in step four simpler, but it's not required for either method.
Step 2: Fill a bag or bowl with undiluted white vinegar
Use plain white distilled vinegar straight from the bottle. Diluting it with water slows the reaction with calcium deposits, so skip that step even though it's tempting to stretch the bottle further. A standard fixed shower head needs roughly one to two cups; a handheld head in a bowl usually needs slightly less since the bowl holds the liquid closer to the nozzles.
If the shower head hasn't been cleaned in six months or more, or you're in a hard-water area, stir in a tablespoon of baking soda before you start. The mixture will fizz for a minute as the acid and base react, and that fizzing action helps loosen crusted mineral flakes before the vinegar even starts its longer soak.
Step 3: Attach the vinegar bag or submerge the head, then let it soak
Slide the bag up over the shower head so the nozzle plate sits inside the pool of vinegar, then wrap a rubber band or zip tie around the neck of the fixture to hold the bag in place without it slipping off. For the bowl method, make sure the nozzle plate stays fully submerged, propping the bowl against the shower wall if you need to.
Thirty minutes is enough for light buildup and regular maintenance cleaning. If the spray was noticeably weak or uneven before you started, extend the soak to a full hour, and for heavily neglected fixtures, owners report leaving it up to two hours works better than repeating a short soak. Avoid soaking rubber-nozzle shower heads much longer than that, since extended contact with straight vinegar can make the rubber brittle over time.
Step 4: Scrub the nozzles to clear stubborn deposits
After the soak, take the bag or bowl away and look at the nozzle plate again. The crust should have softened and turned a lighter color, and some of it may have already flaked off into the vinegar. Dip the toothbrush into the used vinegar and scrub each hole individually, working in small circles to push loosened debris out rather than deeper into the opening.
For nozzles that are still clogged, a toothpick or a bent paperclip can clear the last bit of hardened mineral from inside the hole. Go gently here. Metal picks can scratch a chrome or matte black finish if you jab at it, so use the point to nudge debris out rather than scrape the surface.
Step 5: Rinse the shower head and run the water to test flow
Run the shower head under warm tap water for a minute, aiming the nozzles downward so loosened mineral flakes wash out instead of settling back into the holes. If you removed the fixture for scrubbing, reattach it now and check that the connection is snug enough to prevent leaks at the base.
Turn the shower on and watch the spray for a few seconds. Every nozzle should produce an even, consistent jet with no gaps or spraying at odd angles. If a few holes are still weak, repeat the vinegar soak for another 30 minutes rather than reaching for a wire brush, which can scratch or widen the nozzle openings and shorten the fixture's lifespan.
Common Mistakes to Avoid
The most common mistake with the vinegar method is diluting it to make the bottle last longer. Water cuts the acidity that dissolves calcium and lime, so a weak mix barely touches heavy buildup and leaves you repeating the whole process for nothing. Use it undiluted every time.
Leaving the bag on too long is a close second. Several hours of straight vinegar contact can degrade rubber nozzles and silicone gaskets, and they turn stiff or start to crack. If your shower head has flexible rubber jets you can wipe clean with a finger, stick to a shorter soak and repeat it the next day instead of leaving vinegar on overnight.
Skipping the scrub step is another shortcut that backfires. Vinegar softens mineral deposits, but it doesn't always dissolve them completely on its own, especially in nozzles clogged for a year or more. Rinsing off the bag without a quick toothbrush pass lets the softened crust re-harden in place.
Reaching for a metal wire brush or a sharp scraper is worth avoiding too. It's an understandable instinct when vinegar alone doesn't clear stubborn buildup, but metal bristles scratch chrome and matte black finishes and can widen nozzle openings, which changes the spray pattern for good. When you clean shower heads with vinegar and the deposits still won't budge, a longer soak beats aggressive scrubbing every time.
Our Top Picks
If your current shower head is too far gone for a vinegar soak to fix the spray pattern, or you're shopping for a replacement with built-in scale resistance, these three models turned up consistently well-reviewed for handling hard water without needing to be descaled every month.
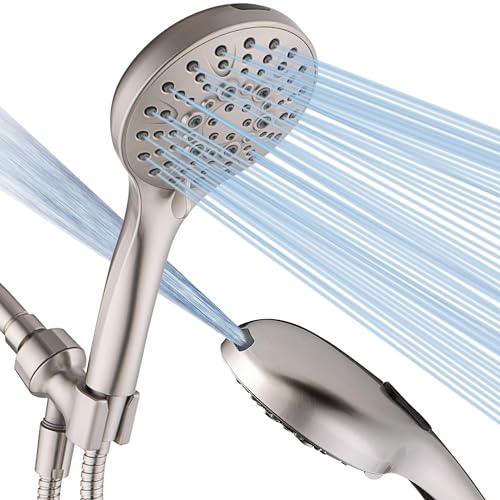
Editor's Pick
BRIGHT SHOWERS High Pressure Shower
Verified owners in hard-water regions consistently point to this model's rubber nozzles, which are easy to wipe clean by hand between vinegar soaks, as the reason it keeps its pressure longer than fixed metal-plate heads.
$39.98
Check Price on Amazon
Best Value
Filtered Shower Head–Shower Head with
Its built-in filter cartridge catches sediment before it reaches the nozzles, which reviewers say cuts down on how often a full vinegar soak is needed.
$35.99
Check Price on Amazon
Premium Choice
Aquabliss SF100 Daily Revitalize Shower
Owners researching filtered options for chlorine and sediment reduction note that its multi-stage filter also lightens the mineral load reaching the nozzles, so descaling comes up less often overall.
$36.99
Check Price on AmazonFrequently Asked Questions
In most homes, soaking your shower head in vinegar every four to six weeks keeps mineral buildup from returning. If you have notably hard water, or pressure drops again within a few weeks of your last cleaning, switch to a monthly schedule instead.
Yes, but keep the soak to about 30 minutes and avoid repeating it more than once a week. Straight vinegar left on rubber nozzles for hours at a time can make them stiff and prone to cracking over months of repeated cleanings.
No. The bag method lets you clean a fixed shower head in place by securing a vinegar-filled bag around the nozzle plate. Removing the fixture only helps if you also want to scrub the connection threads or soak it in a bowl.
A lime-scale remover made for bathroom fixtures works faster on heavy buildup, and a baking soda paste is a gentler option for finishes that react poorly to acid. Vinegar remains the cheapest and most widely recommended option because it's effective on calcium deposits without needing gloves or ventilation.
The acetic acid in vinegar reacts with calcium carbonate and other minerals in hard water, breaking them down into compounds that rinse away instead of hardening into scale. That's the same reaction that makes vinegar effective on kettles, coffee makers, and faucet aerators.
Verdict
Cleaning shower heads with vinegar is a fix you can do in under an hour with something already in your kitchen cabinet, and for most hard-water buildup, that's all it takes. Fill a bag or bowl with undiluted vinegar, let the nozzles soak for 30 minutes to an hour, scrub away what's left, and rinse. Repeat that cycle every four to six weeks and you'll rarely deal with a weak, sputtering spray again.
If you've already run through a few soaks and the pressure still isn't coming back, the fixture itself may be past the point a cleaning can fix, especially if it's several years old and the internal channels are scaled shut rather than the surface nozzles alone. In that case, a replacement built with scale resistance in mind, like the BRIGHT SHOWERS model above, saves you from repeating this process every few weeks. Either way, knowing how to clean shower heads with vinegar first means you only spend money on a new fixture when the old one has earned retirement, not because a two-dollar bottle of vinegar didn't get a fair try.